
Kandi Peyote Cuff Tutorial
Hello, everyone! I have another tutorial for you today. This one is for a basic peyote cuff. These cuffs are flat with only one layer of beads, and have a tighter, sturdier feel to them than the x cuffs. You can make them with as many layers as you prefer and the process is the same, but I am using 4 for this tutorial.
Peyote cuffs take a LOT of string, so keep that in mind - the string shown in the tutorial is much shorter than you'll actually need because it's clearer what's going on that way. A peyote cuff is a very simple and easy cuff to make but also more time intensive than an x cuff.
Since it's easier to understand what's happening if every band is a different color, I have used the nonbinary flag colors for this tutorial. The amount of beads you'll need depends entirely on the size of your wrist - for me, a cuff like this takes 20 beads for each band, so 80 for a 4 layer cuff like this, but I have very small wrists. Chances are you'll need more.
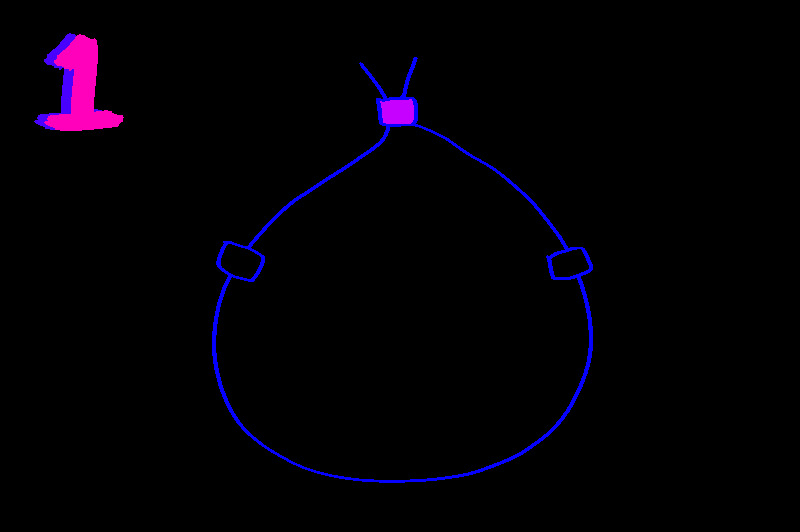
First, string one bead for your bottom band onto each end of your string. Then, gather the ends of your string together and string a single bead for your second band onto both ends of the string at the same time.
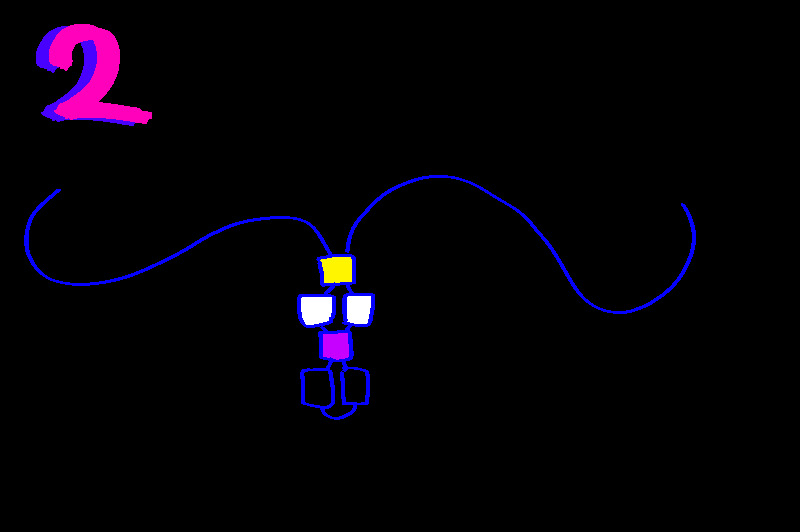
Second, repeat this process with your next two bands - one bead for band 3 on each end of the string, and a single bead for band 4 on both ends of the string at the same time.
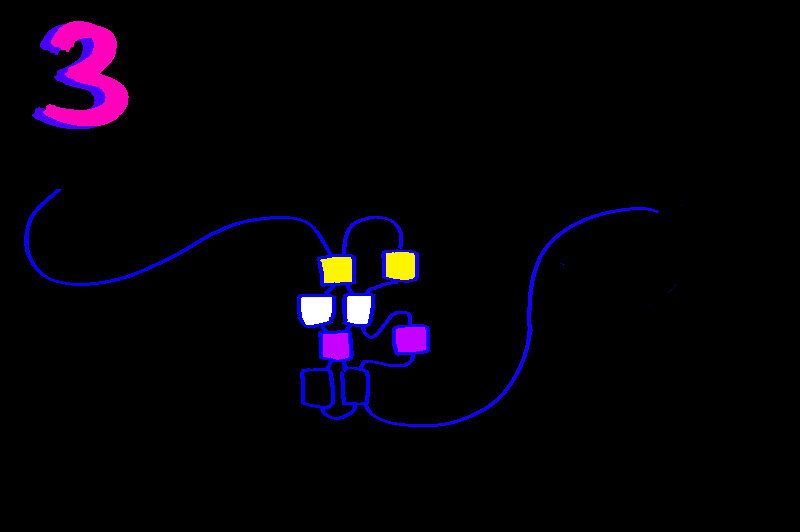
Next, choose an end of your string to work with. It doesn't matter which you start with. Put one band 4 bead onto the string and then thread it back through the band 3 bead that sticks out a little. Then, repeat that with bands 2 and 1.
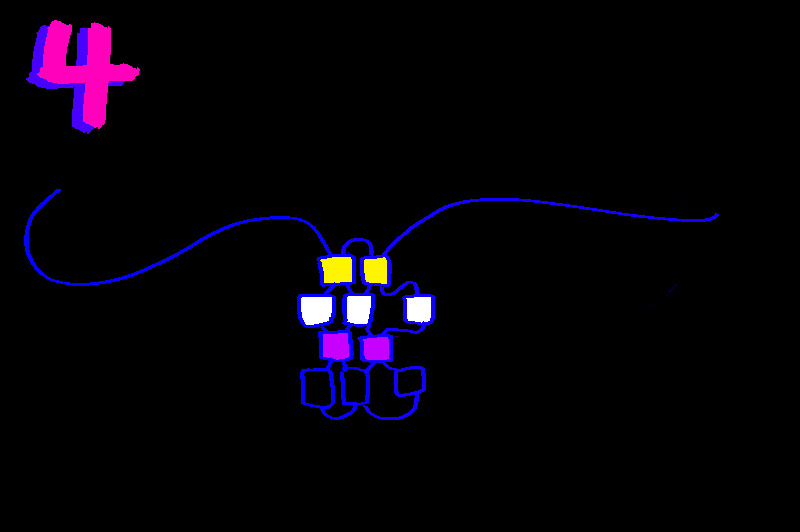
After that, repeat the process in the other direction. You'll keep repeating steps 3 and 4 until you run out of string or until the cuff is long enough that it will fit if you fold it around your wrist. If you run out of string on one side before the cuff is finished, start doing steps 3 and 4 on the other end of the string that's sticking out.
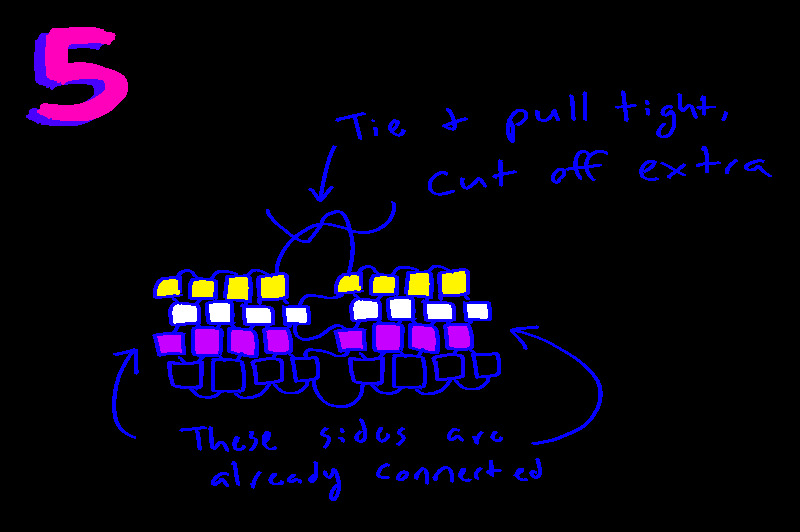
Once your cuff is long enough to fit your wrist if folded around it, fit the edges together like a puzzle and pull one end of the string through to connect them, as shown. Then, pull it tight and tie a knot to fasten your bracelet. It's done!